Adding support for multiple windows to your iPadOS app
Published on: November 4, 2019Updated on: February 10, 2020
Now that Apple has split iPadOS into a separate OS, and launched Catalyst to enable developers to compile their iPad apps for the Mac, there’s a whole new multi-window paradigm we must understand and cater for. Up until this year, we only had to worry about a single window for our iOS applications. This meant that we never had to worry about the user being at two places in our app at the same time. For instance, what would happen if a user has two windows of an app open and both are on the edit profile page?
In this blog post, I will introduce the concept of iPad apps with more than one window to you. Last week I explained that multi-window support is enabled through UIScene, UISceneSession and the SceneDelegate. If you’re not sure what these objects are and what they do, I can highly recommend that you go ahead and read last week’s post first.
This week’s blog post covers the following topics:
- Understanding how a user creates a new scene for your app.
- Defining the scenes that are supported by your app.
- Opening, closing, and refreshing scenes.
- Adding advanced behavior to open new scenes.
Understanding how a user creates a new scene for your app
Before we dive into the details of defining your scenes and implementing code to work with your scenes, let's go over all the ways a user will be able to create scenes for your app once you enable the "Supports Multiple Windows" checkbox in your project settings. We'll not just look at what's made available out of the box, but I also want to show you several of the behaviors your users will likely expect once your application supports multiple windows. After that, we'll have a look at how you can implement multi-window support for your apps.
Ready to get started?
Default ways to open a new scene
In iPadOS, there are two standard paths to opening a new scene. First, the user can drag an app's icon upwards from the dock to create a new scene for the dragged app if an active scene is already on screen. If the app isn't currently visible on the screen, iPadOS will grab an active scene and move that over to where you dropped the app icon. Users can use this method to make your app appear as a flyover or side-by-side with another app.
The second way is to go to the Exposè, select your app to show all windows for your app, and use the plus symbol in the top right corner of the screen to launch a new scene. This will create a new full-screen scene for your app using your app's default scene. The user can then rearrange windows, show them side by side or change one into a flyover using the same gestures and patterns that exist in iOS 12. The only difference is that in iOS 12 every app only had a single scene and in iPadOS 13 an app can have multiple scenes.
In addition to these default methods of opening a scene, there is a special kind of interaction that users will likely come to expect in any app that supports multiple scenes. This interaction is the drag and drop interaction.
Drag and drop interactions your users will likely expect
Users love patterns, and so does Apple. So a good place to look for interactions that your user is likely to expect from your app is the default apps Apple ships with iPadOS. If you examine some of Apple's multi-scene applications, you can see that a lot of them support drag and drop to create a new scene. In Safari, you can pick up a tab and drag it to the side of the screen to open that tab in a new scene. In Contacts, you can grab a contact from the contact list and you can drop it on the side of the screen to show the dragged contact in a new scene. And lastly, in the Mail app, a user can grab the email compose modal and drag it to the side of the screen to open the composer in a new scene.
All of these interactions feel very natural and if your app has similar interaction patterns, it's seriously worth considering implementing drag and drop in a similar way to Apple's implementation to make sure your users feel right at home in your app.
Now that you know about some of the ways your users will expect to open scenes, let's see how you can add support for more than a single type of scene in your app.
Defining the scenes that are supported by your app
If you started your project in Xcode 11 and you've checked the "Supports multiple windows" checkbox, you've done the first couple of steps to support multiple scenes. Your app can now have more than one active scene, and iOS will always use your SceneDelegate to set up your scene. Before we continue, go ahead and grab this blog post's sample project, open the .xcodeproj in the Starter folder and examine the project. It's a very simple cat image viewer application. I know, super cute. If you don't want to follow along, here's a screenshot of the app.
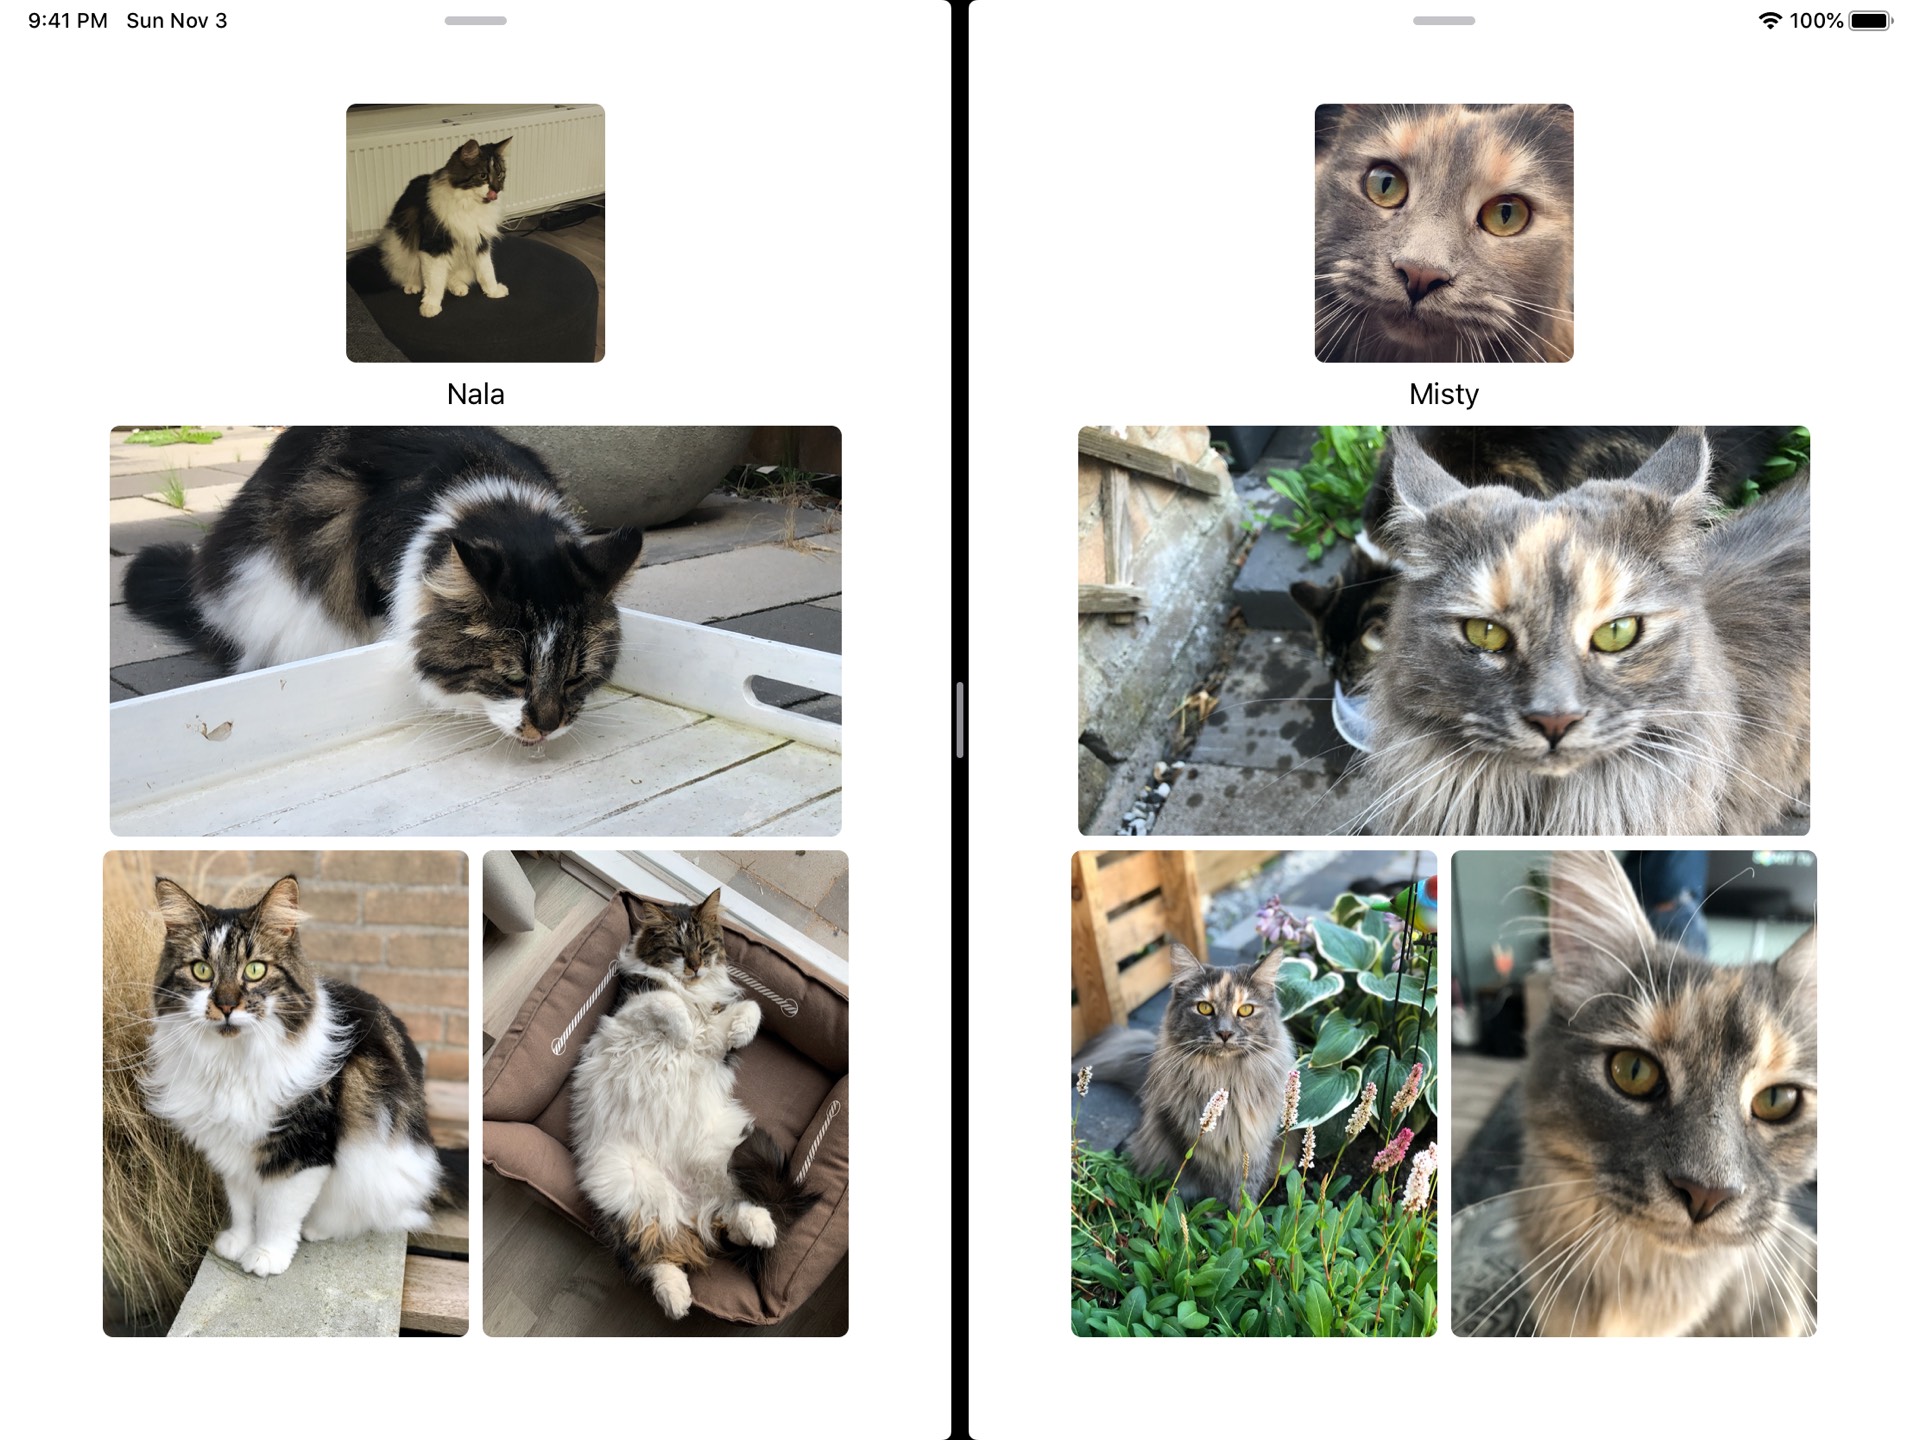
Okay, back to business. Cats are cool but it would be even cooler if you could see the detail page for the cats side by side, for even more cuteness. When a detail page is tapped, we'll go ahead and open a new scene to display the detail page in. Note that this is probably not what you'd want to do in a real application. Normally a simple tap should just push a detail view in the existing scene, and you'd open a new scene if a user drags the cat picture to the side of the screen. We'll implement this drag and drop behavior in the last section of this blog post. For now I just really want to get you up and running with multiple scene support.
If you examine the sample project, you'll find that it contains a secondary SceneDelegate object called CatSceneDelegate. This specific SceneDelegate looks very similar to the default SceneDelegate that Xcode generates except instead of the app's main view, the CatSceneDelegate uses the cat detail page.
To make sure that your app is aware of this new scene delegate, you must add a new entry to the Application Scene Manifest's Scene Configuration array.
A scene configuration is nothing more than a string identifier and a reference to a scene delegate that should be used when your application is asked to create a scene. The default scene configuration is called Default Configuration and uses the $(PRODUCT_MODULE_NAME).SceneDelegate object to set up its scene and display it to the user.
Tip:
You must always use the$(PRODUCT_MODULE_NAME).prefix before your scene delegate's class name to make sure iOS knows where to look for your scene delegate while running your app.
To add our cat detail scene configuration, click on the plus icon next to the Application Session Role keyword. Xcode will create a new configuration entry for you. Remove the Storyboard Name and Class Name fields. Set $(PRODUCT_MODULE_NAME).CatSceneDelegate as the Delegate Class Name and Cat Detail as the Configuration Name. Make sure to rearrange the configurations by dragging them so that the Default Configuration is above the Cat Detail configuration. Your configuration should like the following screenshot:

Run the app, it should work as normal because we're not launching any scenes with our newly created scene configuration yet. Let's go ahead and do that next!
Opening, closing, and refreshing scenes
In a typical application, you will want to control when your app opens a new scene or when it closes one. But how do you open or close a scene, and why would you want to refresh a scene? In this section, I will answer these questions. Let's start by opening a new scene and implementing logic to close it. We will then look at some advanced logic to determine whether a new scene should be opened, or if we can reuse an existing scene. Lastly, we will look at scene refreshing.
To open a new scene, you pass a request to your UIApplication object. The UIApplication will then check if a new scene session needs to be created, or if an existing scene session can be used. In the sample code, I've added a method called didTapCat(_:). Let's add some code to this method to open the cat detail page in a new scene:
let activity = NSUserActivity(activityType: "com.donnywals.viewCat")
activity.userInfo = ["tapped_cat_name": tappedCat(forRecognizer: sender)]
UIApplication.shared.requestSceneSessionActivation(nil, userActivity: activity, options: nil, errorHandler: nil)
The preceding code isn't terribly complex, and it's all we need for a very simple detail page. We create an NSUserActivity that contains all information needed to determine that we want to view a cat detail page, and what cat we want to view the detail page for. After configuring the NSUserActivity, we call requestSceneSessionActivation(_:userActivity:options:errorHandler:) on UIApplication.shared to initiate the request to launch a new scene. When we call this method, application(_:configurationForConnecting:options:) is called on your AppDelegate. You must return an appropriate UISceneConfiguration from this method that matches a configuration that's in your Info.plist. Update this method in this method in AppDelegate.swift so its body looks as follows:
if let activity = options.userActivities.first, activity.activityType == "com.donnywals.viewCat" {
  return UISceneConfiguration(name: "Cat Detail", sessionRole: connectingSceneSession.role)
}

return UISceneConfiguration(name: "Default Configuration", sessionRole: connectingSceneSession.role)
We check whether we have a user activity that matches the type we expect. If one exists, we create and return an instance of our Cat Detail configuration. If we don't have the expected user activity, we return the Default Configuration. We're almost ready to see the app in action. Let's just have a quick look at the CatDetailSceneDelegate.swift that's already created for you. The following line are especially interesting:
let detail: CatDetailViewController
if let activity = connectionOptions.userActivities.first,
  let catName = activity.userInfo?["tapped_cat_name"] as? String {
  detail = CatDetailViewController(catName: catName)
} else {
  detail = CatDetailViewController(catName: "default")
}
We check whether a user activity was provided to us. If we have one, we extract the relevant values from it. If this fails, or if we don't have a user activity, we create a CatDetailViewController with a default name. You'll see why we need this in a moment. If you run the app now, you'll see that tapping one of the two cats spawns a new scene every time. While this is cool, it would be much better to reuse the same scene session and activate it if one of our cats is tapped.
This can be achieved by looping over the currently active sessions and inspecting the targetContentIdentifier associated with each session's scene. If we find a match, we can request activation of that specific scene rather than asking for a new scene session. Update didTapCat(_:) so it looks as follows:
@objc func didTapCat(_ sender: UITapGestureRecognizer) {
  let activity = NSUserActivity(activityType: "com.donnywals.viewCat")
  activity.targetContentIdentifier = tappedCat(forRecognizer: sender)

  let session = UIApplication.shared.openSessions.first { openSession in
    guard let sessionActivity = openSession.scene?.userActivity,
      let targetContentIdentifier = sessionActivity.targetContentIdentifier  else {

        return false
    }

    return targetContentIdentifier == activity.targetContentIdentifier
  }

  UIApplication.shared.requestSceneSessionActivation(session, userActivity: activity, options: nil, errorHandler: nil)
}
Note:
In one of Apple's WWDC presentations they mention the use of predicates to automatically find the most appropriate scene for a target content identifier. Unfortunately, I haven't been able to get this to work myself. If you have, please do reach out to me so I can update this post.
When you run the app again in Xcode, you will notice that it recreates all the scenes that were active when you quit the app. This is why you added the fallback earlier. When the app is used in normal conditions, this shouldn't happen. But it's good to guard against it for development purposes anyway. Despite Xcode recreating existing detail scenes with the default identifier, tapping the same cat multiple times should now only open one scene for each cat.
When a user wants to close a scene, they can do this from the iPad's Exposé. There is a close button on the cat detail page right now, but it doesn't do anything, Let's write some code to destroy the current scene if a user taps the close button. Add the following code to the close method in CatDetailViewController.swift:
if let session = self.view.window?.windowScene?.session {
  let options = UIWindowSceneDestructionRequestOptions()
  options.windowDismissalAnimation = .commit
  UIApplication.shared.requestSceneSessionDestruction(session, options: options, errorHandler: nil)
}
This code obtains the current session and creates an instance of UIWindowSceneDestructionRequestOptions. We can use this object to configure a nice animation for when the scene is discarded. In this case, we pick a commit style. You can also choose decline and standard depending on the message you want to send to the user.
Now let's look at refreshing a scene. This is something you'll typically want to do to make sure your app's snapshot in the iPad Exposé is up to date and accurately reflects your user interface. For the cat app this doesn't make a lot of sense, but let's assume it would. The following code would go over all currently connected scene sessions and if the session is used to display a relevant user activity, we ask the application to refresh the session:
for session in UIApplication.shared.openSessions {
  if session.scene?.userActivity?.activityType == "some.activity.type" {
    UIApplication.shared.requestSceneSessionRefresh(session)
  }
}
Note that the refresh action might not take place immediately, the system reserves the right to delay the refreshes to an appropriate moment in time.
Now that you've seen how you would create a session and reuse it for the same content, how to destroy a session and how to refresh a session, it's time to implement one last method of creating new scenes; drag and drop.
Adding advanced behavior to open new scenes
We've implemented everything we set out to implement. All we need now is drag and drop support. I won't go into all the fine details for drag and drop in this post. Instead, I will show you how to implement a drag interaction for this specific scenario and how to configure your app so it can use drag and drop to open new scenes. Before your app can support drag and drop to open new scenes, you must register the user activity types your app will handle in your Info.plist. Add a new NSUserActivityTypes key of type Array and add the user activity types you wish to support to this array. You should end up with an entry that's similar to the following screenshot:

Next, add the following two lines of code to CatsOverviewViewController.swift right after the code that sets up a tap gesture (should be around line 41):
let dragInteraction = UIDragInteraction(delegate: self)
image.addInteraction(dragInteraction)
The preceding code adds drag support to the image view. The next step is to make CatsOverviewViewController.swift conform to UIDragInteractionDelegate so it can provide the appropriate drag item that's used to open a new scene for the app. Add the following extension to CatsOverviewViewController.swift:
extension CatsOverviewViewController: UIDragInteractionDelegate {
  func dragInteraction(_ interaction: UIDragInteraction, itemsForBeginning session: UIDragSession) -> [UIDragItem] {
    let selectedCat = cats[interaction.view?.tag ?? 0]

    let userActivity = NSUserActivity(activityType: "com.donnywals.viewCat")
    userActivity.targetContentIdentifier = selectedCat
    userActivity.title = "View Cat"

    let itemProvider = NSItemProvider(object: UIImage(named: selectedCat)!)
    itemProvider.registerObject(userActivity, visibility: .all)

    let dragItem = UIDragItem(itemProvider: itemProvider)
    dragItem.localObject = selectedCat

    return [dragItem]
  }
}
After doing this, run the app and drag one of the two cats to the side of the screen. You should be able to drop the image to create a new floating scene or create a new one that's opened right next to the existing scene. Amazing that we did this with only a few lines of code right?
In summary
Wow! This post turned out much longer than I expected! You have learned a ton about adding support for multiple scenes to your iPad app, and there's still more for you to explore! We haven't looked at supporting URLs or Shortcut Items in this blog post. And we also didn't have time to go over adding a target-content-id to your push notifications to make certain notifications launch in a specific scene. I'm sure you'll be able to figure this out on your own now that you have a solid foundation of scene session knowledge.
Let's recap what you've learned in this post. First, you learned about the ways users are likely to expect to use multiple scenes with apps that support them. Then you saw how you can configure your Info.plist with all the scenes that your app supports. Next, you saw how to launch a new scene when a user taps a button, and how to destroy it when they tap another button. You also saw how you would refresh a scene session if needed. And lastly, we added drag and drop support to allow users to drag elements of your app to the side of the screen to launch a new scene.
This is cool stuff! And I'm sure you're going to build amazing things with this knowledge. And, as always, if you enjoyed this blog post, have feedback, questions or anything else. Don't hesitate to share this post with your friends and reach out to me on Twitter. If you're looking for the sample code for this post, it's right here on Github.
