Configuring projects with xcconfig
Published on: November 13, 2019Updated on: January 30, 2026
You might want to install two versions of your app side by side, like a development build and a release build. Or you might want each build to talk to a different backend so you don't accidentally test against production data. xcconfig files make those kinds of tweaks predictable and easy to manage.
In practice this is about reducing risk. When you can clearly separate dev, staging, and production settings, it becomes much harder to wipe production data, use the wrong signing team, or ship a build that points at the wrong service.
By the end of this Quick Tip you'll know how to create an xcconfig, attach it to a build configuration, and use it to drive Info.plist values at runtime.
Creating and using your xcconfig file
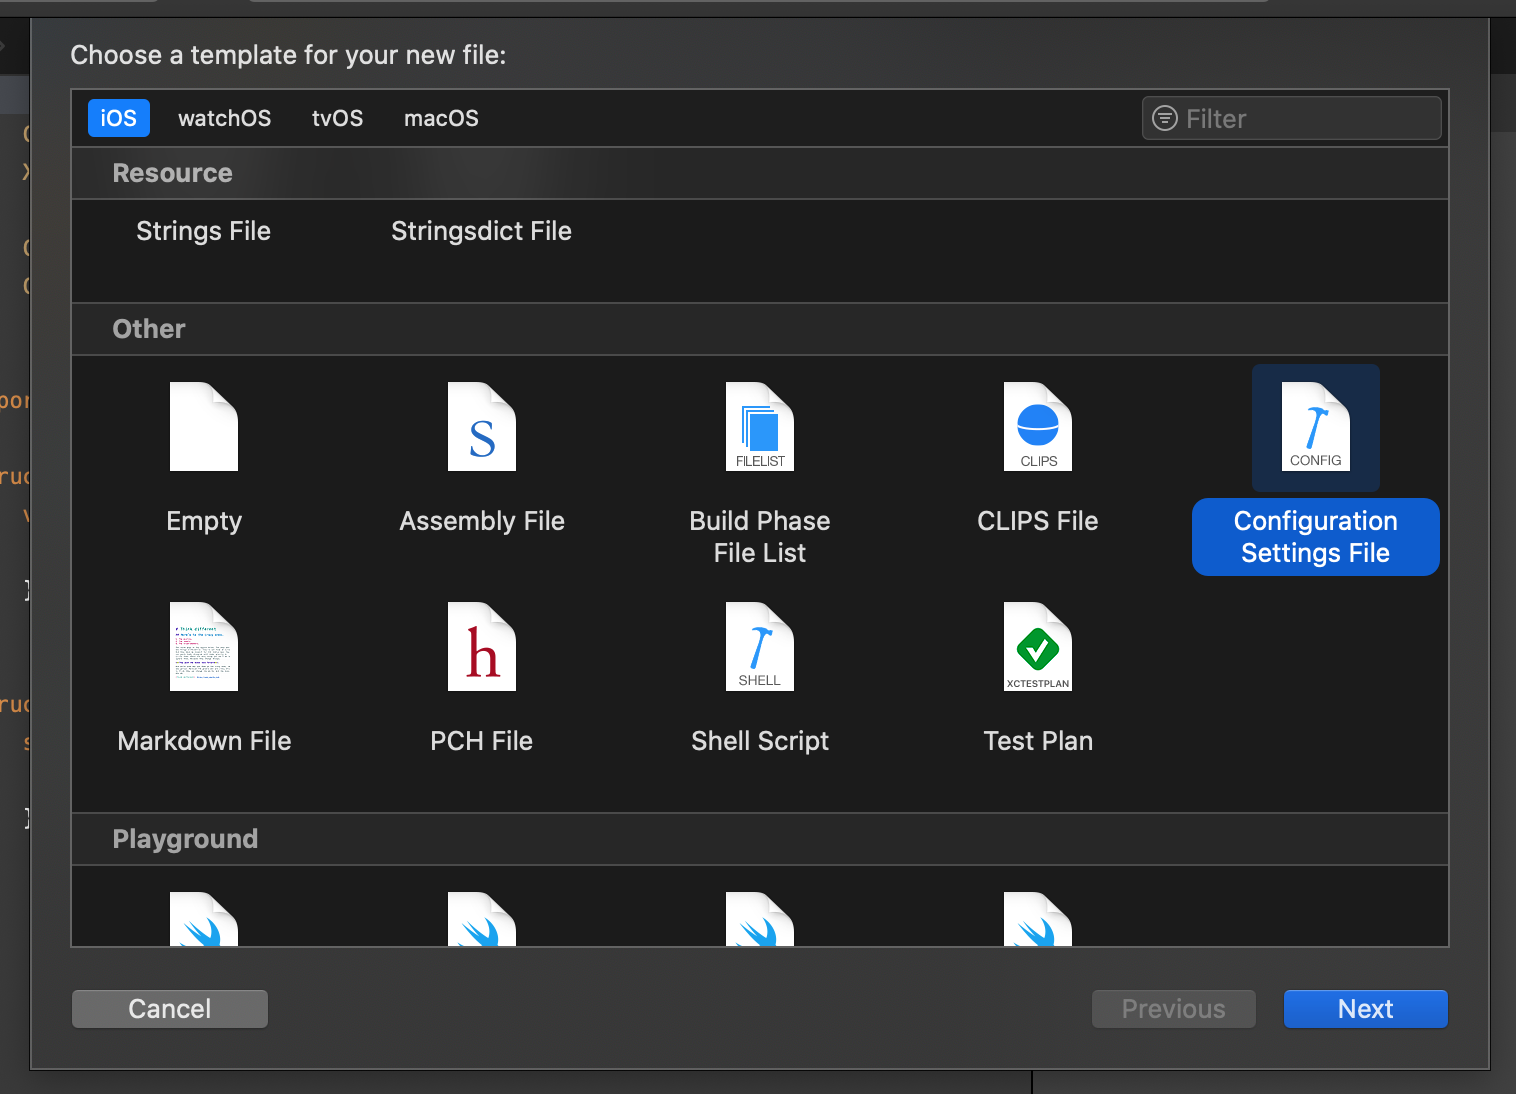
To create an xcconfig file, choose File -> New -> File... in your project. In the new file dialog, scroll down until you see Configuration Settings File in the Other section.
After choosing an appropriate name (like debug.xcconfig), open the file in Xcode and add configuration rules. An xcconfig file contains key/value pairs in this format:
PRODUCT_BUNDLE_IDENTIFIER = com.xcconfig.sample
PRODUCT_NAME = Config Example
You can configure just about anything. If you're not sure which key to use, open your .xcodeproj in a text editor and look for the setting you're trying to override.
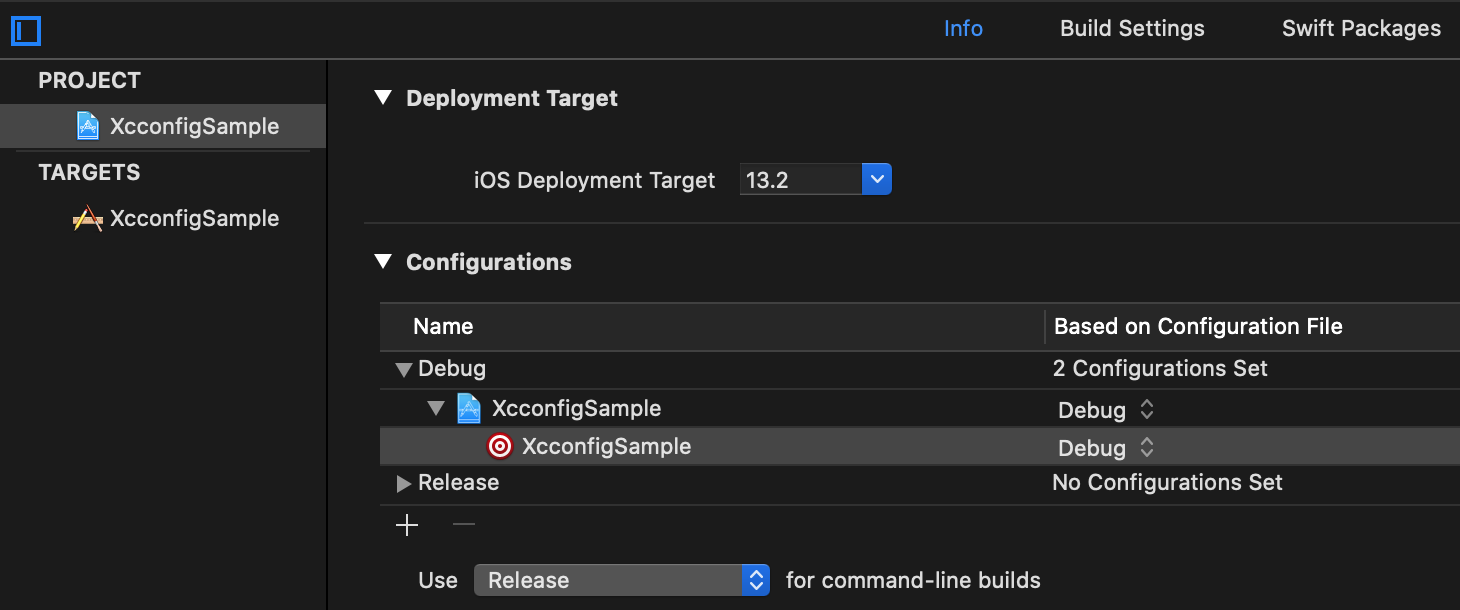
To make Xcode apply your xcconfig, go to your app's project settings, find the build configuration you want, and select your config file as shown in the screenshot below:
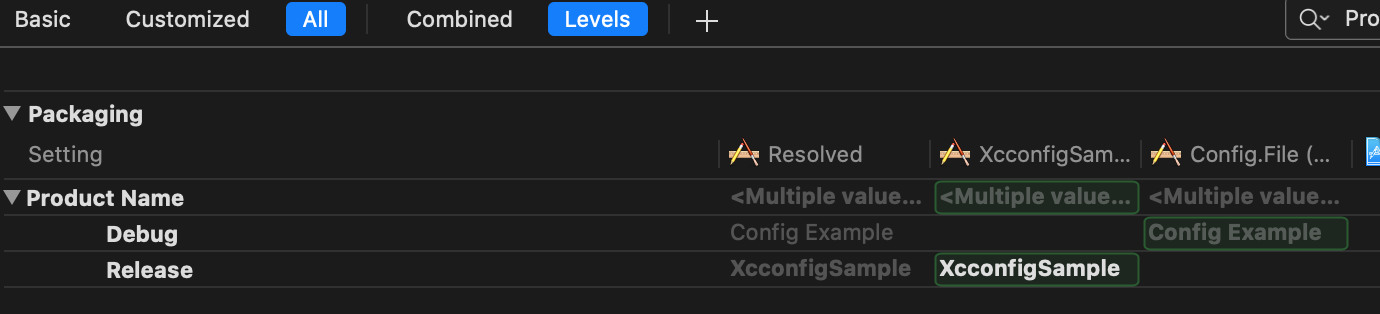
After doing this, Xcode might still ignore some keys. If that happens, go to your project's Build Settings and enable the Levels view. The green value is the one Xcode will actually use at build time. If Xcode is picking the wrong value, clear it so Xcode falls back to the next best match. The screenshot below shows what that looks like.
There are lots of settings you can manage this way, and the Levels view is great for understanding where a value is coming from. Next up: using xcconfig to drive runtime configuration through Info.plist.
Using xcconfig and your Info.plist to configure your app
If you want your app to use different settings per build, like a development API endpoint, you can combine Info.plist and xcconfig. This is especially useful for protecting production data by keeping a separate dev or staging environment. Add a key to your config, reference it in Info.plist, and then read that value in code. For example, your xcconfig could contain:
API_ROOT = dev.myapp.comThen add a key to Info.plist and use $(API_ROOT) as the value. At runtime you can read that key just like any other Info.plist value. It's a simple pattern that keeps build-time and runtime configuration in sync, and it makes it harder to mix up environments by accident.
In Summary
In this Quick Tip you saw how xcconfig files can drive build-time settings like bundle identifiers, product names, teams, and code signing. You also saw how to pass values into Info.plist so runtime configuration can vary per build.
If you only remember one thing: attach the right xcconfig to each build configuration, and use Levels to verify which value Xcode will actually use.
If you have any questions, compliments or feedback, don't hesitate to find and message me on X
