Debugging network traffic with Charles
Published on: January 22, 2020Updated on: February 10, 2020
When you perform a URL Request in your app, you typically configure the request in your code and when it's all set up you pass it off to a URLSession data task, and the request should succeed if everything goes as expected. When the request is misconfigured, the server will hopefully return a useful error and you can fix your code accordingly. There are times, however, where the server does not give the information you need. Or your requests succeed but your results are not quite what you expect. It's times like these when I really wish that there was an easy way to see exactly what data my app is sending to the server and, equally important, what the server is sending to my app.
Unfortunately, there is no tool built-in on iOS that helps developers to inspect the details of their network calls. This does not mean that all hope is lost. There are third-party tools available that can proxy network traffic, allowing you to inspect exactly what data is transmitted over the proverbial wire. Today, I would like to quickly show you how you can use a tool called Charles proxy to inspect network traffic from both the simulator and your device.
Installing and configuring Charles
The first step to using Charles is, of course, installing it. You can download Charles right here on its product page. Charles is a paid tool, it costs $50 for a single license and (unfortunately) I don't have any promo codes for you, nor am I affiliated to Charles in any way. So this is in no way a promotional post where I try to get you to buy Charles for my own gains. This really is a tool that I use almost every day, and it has helped me inspect network traffic for my apps for several years now. If this tool can save you two hours of debugging over its lifetime, it's absolutely worth the $50 in my opinion. But that's just my opinion.
If you started your download at the start of the previous paragraph and read the whole bit after the download link, the download is hopefully completed by now. Follow the installation instructions (open the dmg and drag the app to your Applications folder), and launch the app. Upon its first launch, Charles will ask whether it configure your networking settings automatically. I'm not entirely sure what Charles does when you click "Grant privileges" but I personally have this setting enabled after consulting with some people I trust. This setting is not required to use Charles so you can safely click "Not Yet".
When Charles launches, you should immediately see network traffic appear as shown in the screenshot below.

A lot of the traffic that's shown will have locks displayed in front of it because it's encrypted using SSL. The origin of this traffic is your Mac. You can turn off Charles' macOS proxy in the Proxy menu, or by pressing cmd+shift+P. There is no further setup needed at this time, let's see how you can use Charles with the iOS simulator.
Using Charles with the simulator
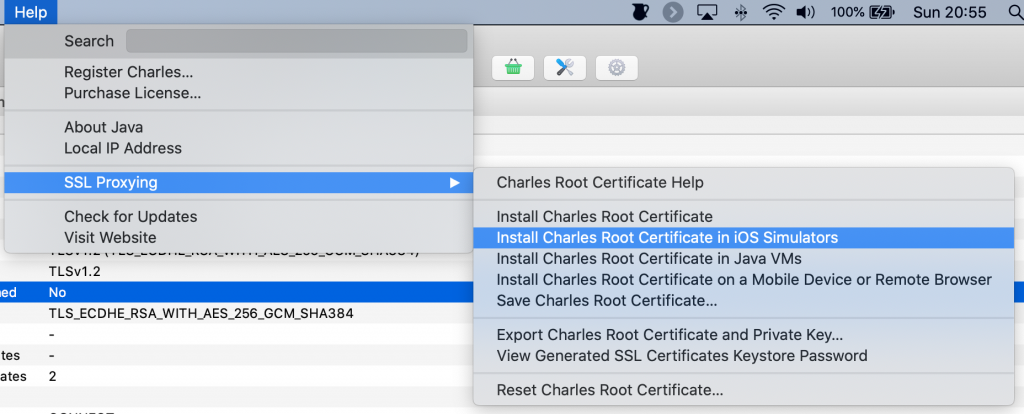
To use Charles with the iOS simulator, you need to install Charles' certificates in the simulator. You need these certificates in order for Charles to be able to proxy the simulator's networking traffic through its interface. You can install the simulator certificates through Charles' help menu as shown in the following screenshot:
After installing the Charles root certificate in the iOS simulator, you can open Xcode and run your app in the simulator. Note that you must have the macOS proxy active for Charles to route the simulator's network traffic through its proxy. When you run your app, you should see your app's network traffic appear in Charles' structure list. Note that any https resource will be obfuscated as indicated by the lock icon before the hostname. This isn't great if we want to debug an endpoint that uses SSL so let's see how we can fix that next.
Help! My simulator traffic is not showing up in Charles after installing the certificates
Charles can be a little finicky when you initially set it up. When I encounter this problem on a new simulator or a fresh install of Charles I usually close Charles after installing the certificates while the simulator is open, then once the certificates are installed, I also close the simulator. When both are closes I relaunch Charles, and when Charles is launch, I relaunch the simulator. This usually fixes the problem. If it doesn't a full reboot of your machine and retrying might help too.
Enable SSL proxying in Charles
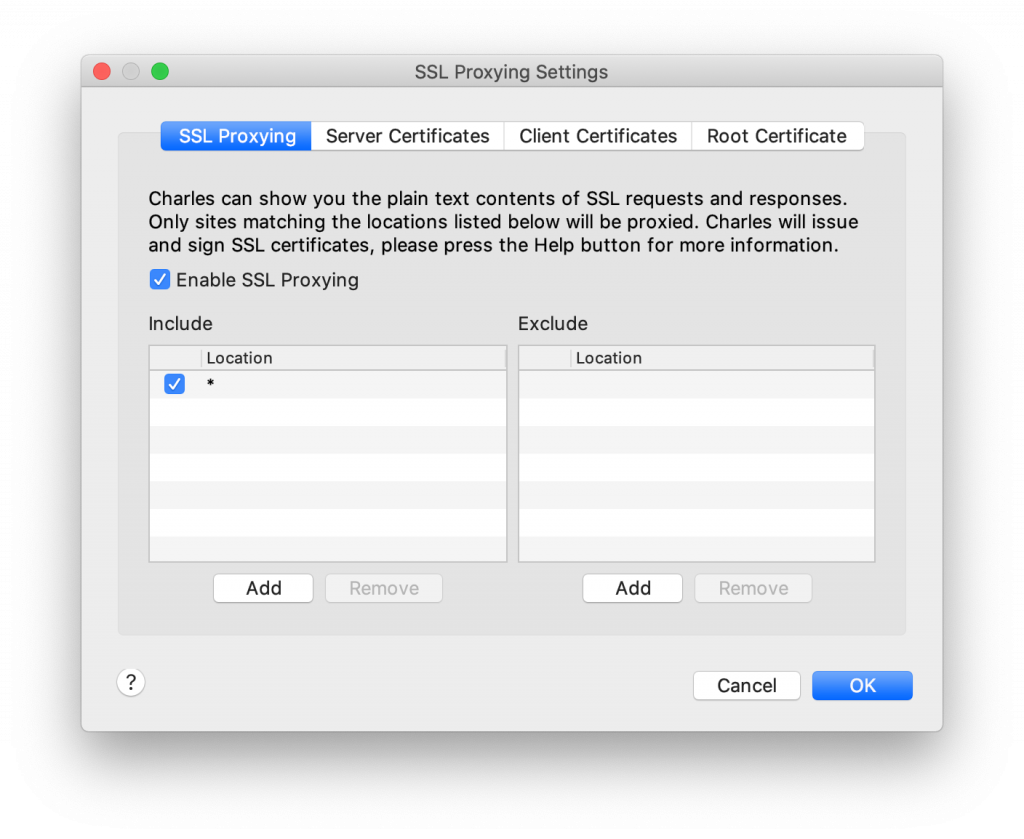
To enable SSL proxying in Charles, we need to configure Charles so that it attempts to proxy specific hosts (wildcards are allowed). This is great for debugging but if you try to proxy hosts you don't own for apps you don't own, those apps might function in ways you didn't expect. This is especially true if the apps that you're proxying traffic for use SSL pinning which is a technique to enforce the integrity of an SSL certificate at the application level. To enable SSL proxying in Charles, go to the Proxy menu and select SSL Proxying Settings or press cmd+shift+L. If you want to proxy all traffic, specify * as the hostname and leave the port field empty.
If you run your app again, you should see multiple hosts with a globe or other non-lock icon in front of them. It's likely that you're not interested in most of this traffic. You can use the filter option at the bottom of the sidebar to filter hosts you're interested in, or you can right-click on a host and select Focus. Selecting this will split your Structure view in the hosts you want to focus on and "Other hosts".
Inspecting the contents of a request and response
When you drill down into a hostname and select one of the files that were downloaded, Charles' detail view will show you details about a request. If you select the Contents tab, you can inspect the request's headers, HTTP body, and the server's response.
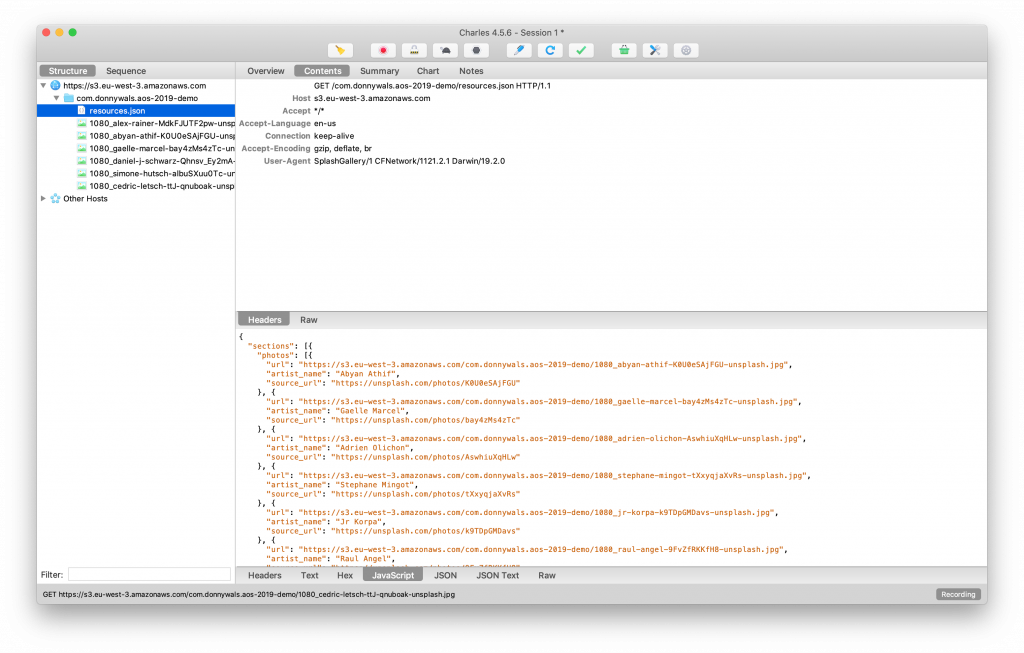
The top section of the detail view contains information about your request. In the screenshot above I made the request headers visible, the Raw option in the middle of the screen would display a raw version of the request. The response information is displayed at the bottom. Because this request loaded a JSON file we get several options to view the JSON file structure and more. We can also inspect response headers and the raw request body.
All of this information can be extremely valuable if you want to verify whether you are sending the correct headers or parameters to a server, or if you want to verify that the response you're receiving from a server is the response you were expecting.
Using Charles with a real device
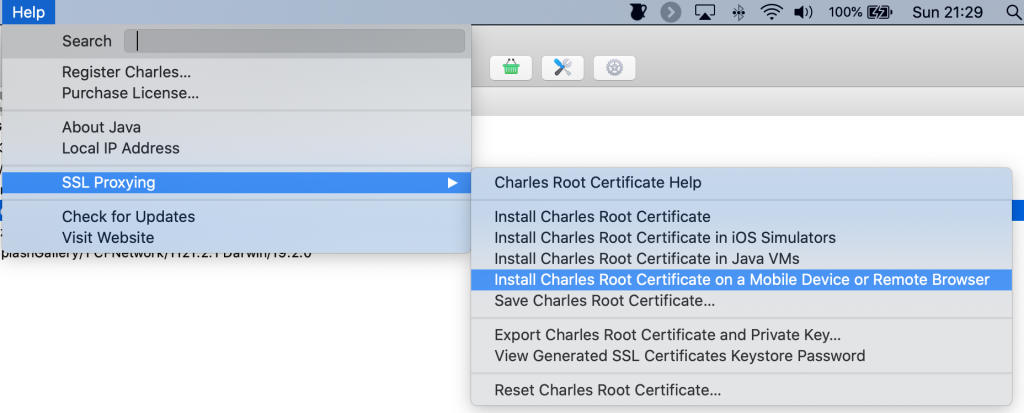
Running Charles on a simulator is nice, but sometimes you might want to run your device's network traffic through Charles to debug your app. You can do this by proxying your device through your machine and then installing the Charles root certificate on your device. To do this, go to the Help menu and select the appropriate option from the SSL Proxying menu as shown in the following screenshot:
Clicking this option will show you the IP address to proxy your devices through, and instructions to install the Charles root certificate on your device.
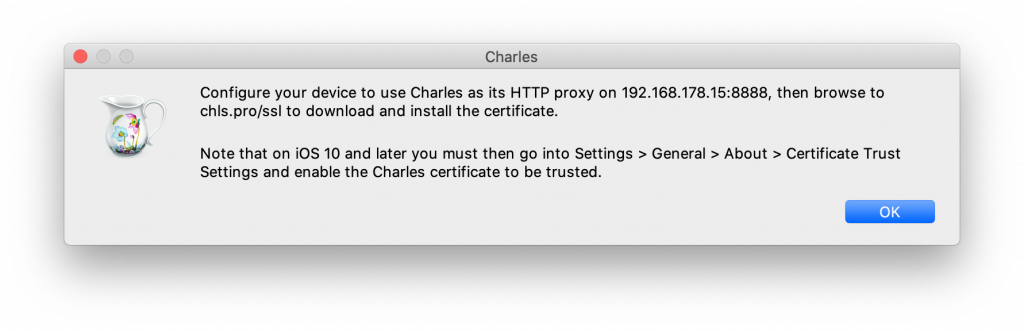
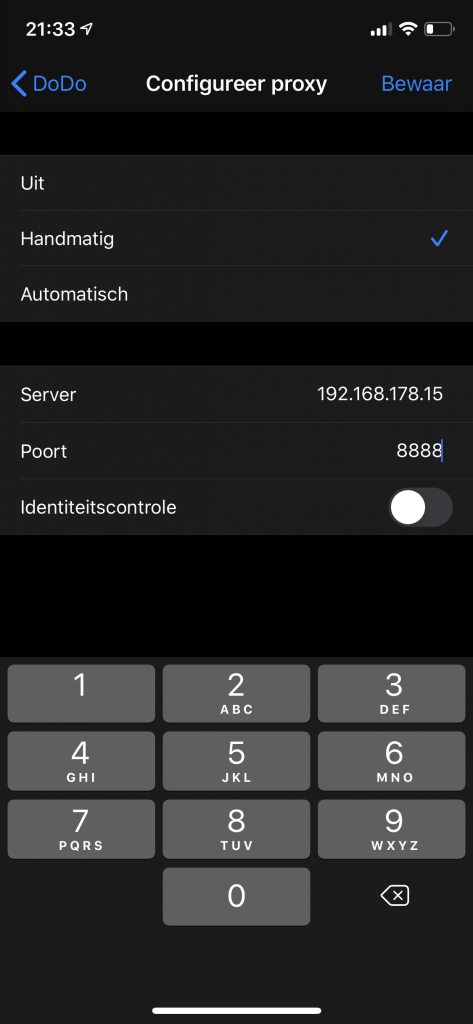
To proxy your device's traffic through your mac, make sure both devices are on the same network and tap the little i button next to the WiFi network you're connected to on your device. In the menu that appears, scroll down and select the proxy menu item. Configure the proxy manually and use the settings that are shown in the dialog that Charles presented in the previous step. Your settings should look a bit like those in the following screenshot.
After setting up your device proxy, follow the instructions provided by Charles in the dialog that appeared earlier. Once completed, Charles should ask for permission to route traffic from your device through its proxy. Accept this, and traffic should immediately start to appear in Charles. When you're done debugging, don't forget to disable the proxy on your device or it won't be able to access the internet if Charles isn't running.
In summary
In today's tip, you learned how you can use Charles proxy to inspect and debug network traffic that goes on in your app. Being able to debug network calls is an essential skill in the toolbox of any iOS developer and I'm planning to write more advanced posts about Charles' capabilities in the future. Because it truly is a powerhouse.
For now, I wish you happy debugging sessions and don't hesitate to shoot me a message on Twitter if you have any questions about debugging your network calls.
