Connecting your git repository with a remote server
Published on: January 18, 2024Updated on: April 23, 2024
Having a local git repository is a smart thing to do. It’s even smarter to push your local git repositories up to a remote server so that you can collaborate with others, clone your repository on a separate machine, or have a backup of your code in case you’re replacing your current development machine with another. A possibly less obvious benefit of hosting your git repository somewhere is that lots of git servers provide useful features like Pull Requests for code reviews, issue tracking, and more.
In this post, you will learn how you can set up a new repository using GitHub, connect your local repository to it, push code, clone your repository on a new machine, and more. The goal of this post is to provide you with a good overview of the kinds of features and workflows that you unlock once you’ve got your git repository set up with a remote like GitHub.
I’m choosing to use GitHub in this post as my remote because it’s one of the most well known and widely used git platforms out there. It’s not the only one, and it certainly doesn’t mean that the others aren’t worth using. Platforms like GitLab and Microsoft Azure Repos work fine too.
Creating a remote git repository
If you don’t have a GitHub account yet, that’s the first thing you’ll want to do. You need to have an account in order to use GitHub.
Once you have your account set up, you can create a new repository by clicking on the “New” button on the page that’s presented as your main page. You can also click here to create a new repo.
Once you’re on the new repo page, you’ll see a form that looks as follows:
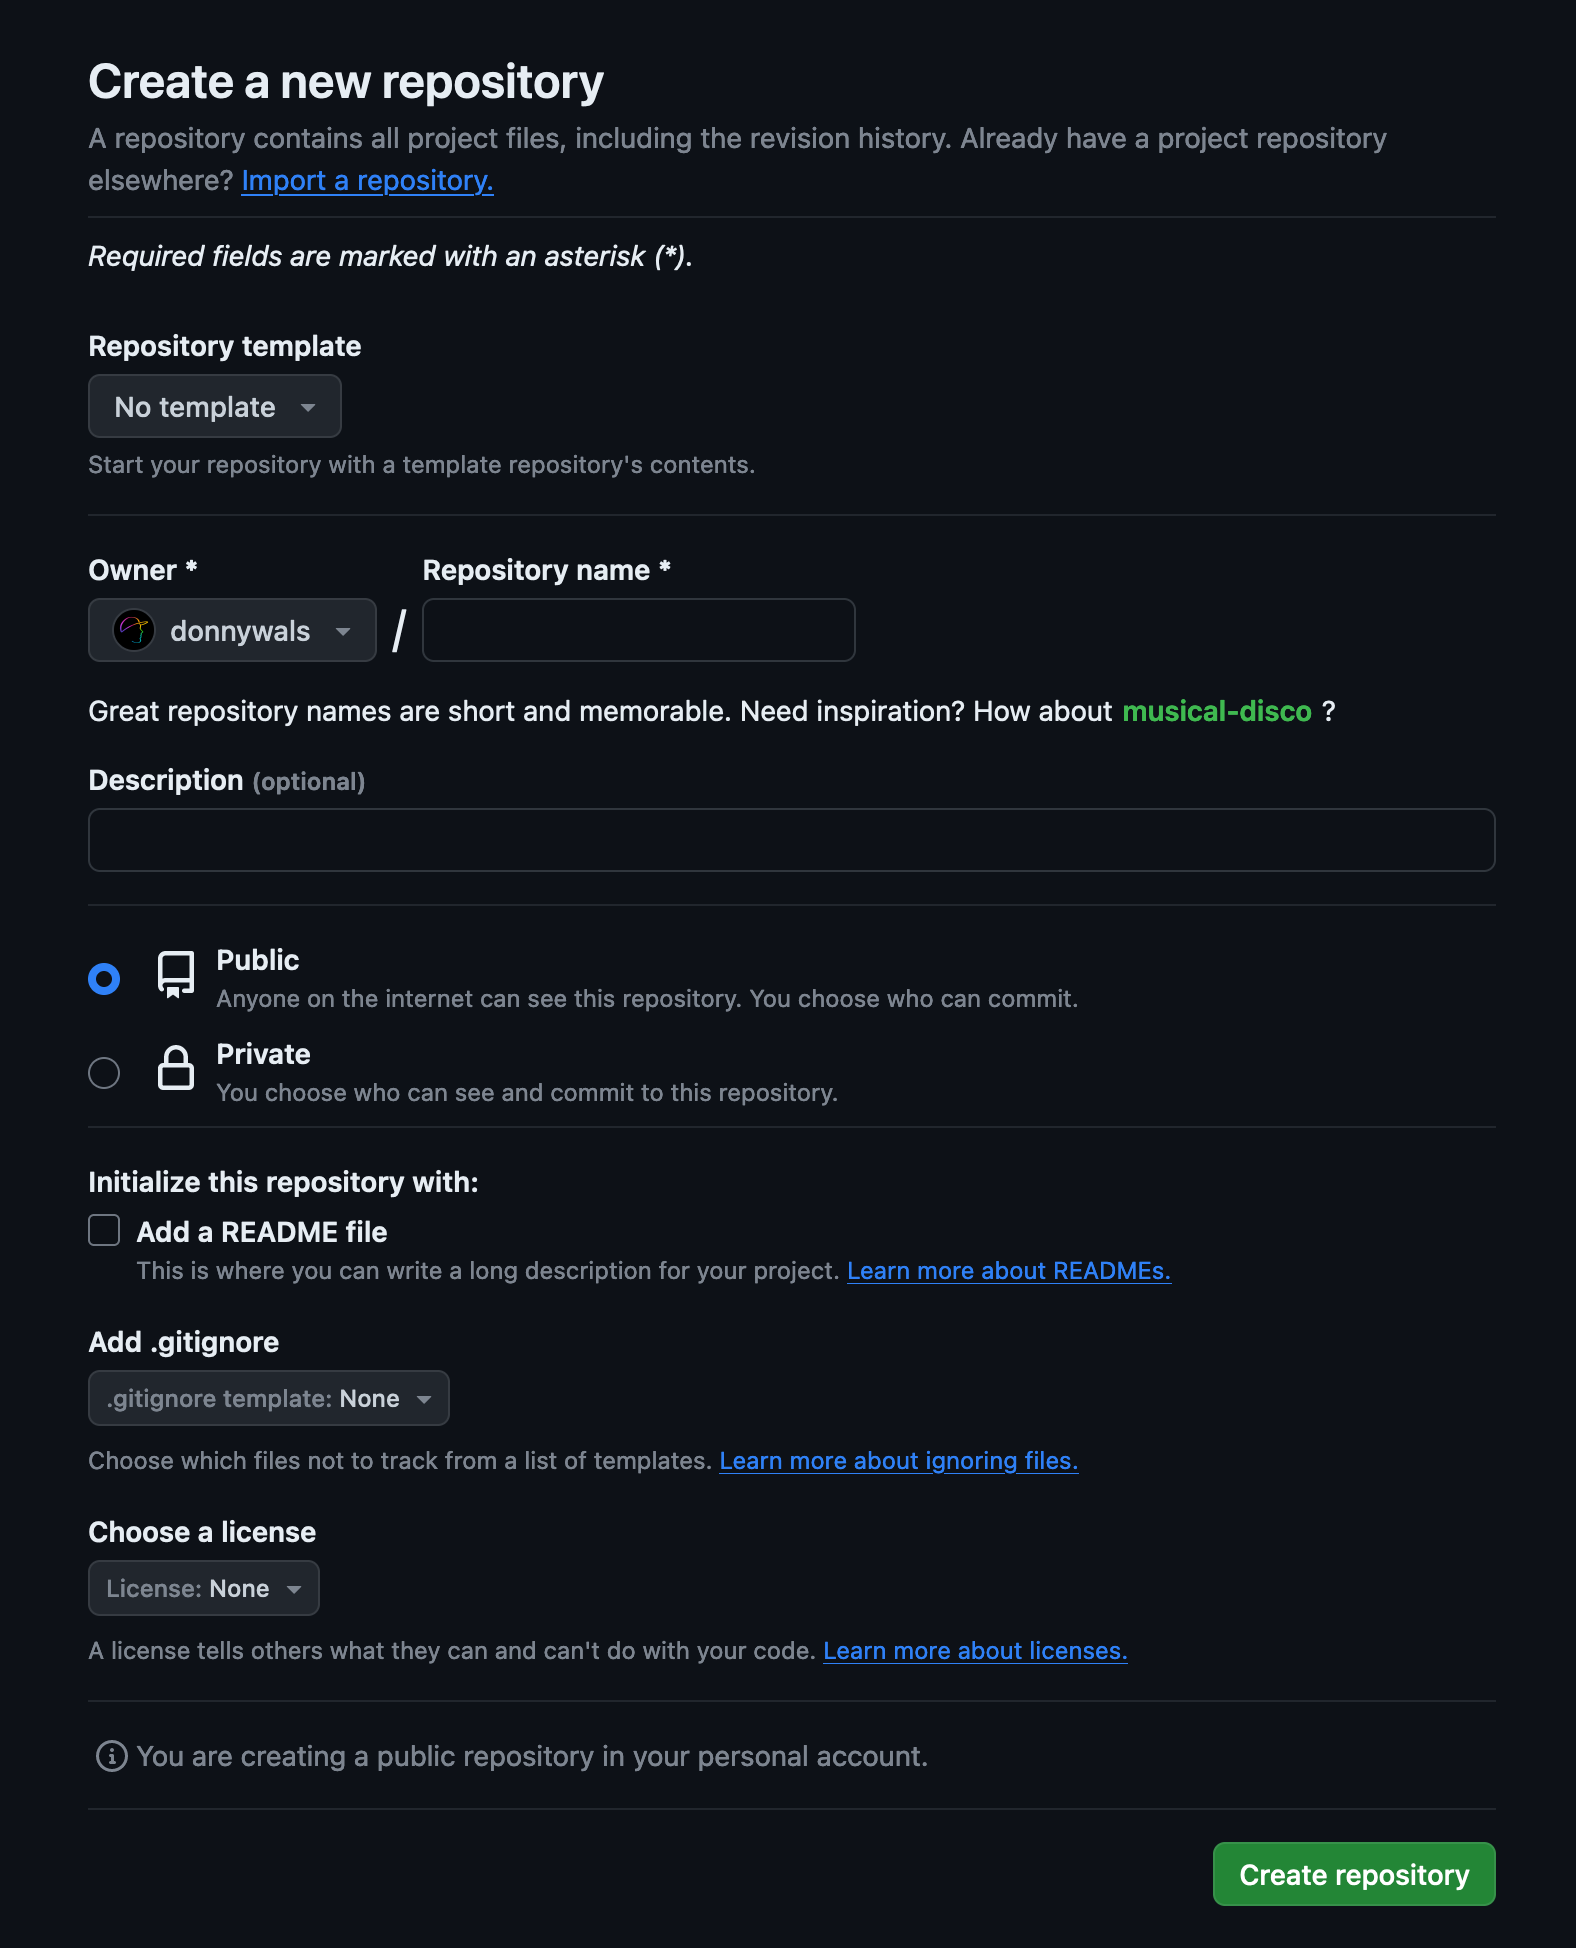
As your repository name you should pick a short and simple name that reflects your project. Usually I pick the name of the app I’m working on and replace all space characters with dashes.
As a description for your repository you can write a short sentence about your project.
If your working on your project alone and you want to prevent anybody from discovering and cloning your project, make sure you set your project to Private. If you want to allow people to discover, browse, and clone your code you should keep your repository Public. This is especially useful if you intend to open source your project at some point.
You can choose to initialize your repository with a README file if you like. If you’re planning to connect an existing repository that you have locally to the project you’re setting up right now, don’t check this checkbox. You’ll end up overwriting the generated README when you push your project anyway so there’s no point in creating one now.
The same applies to the license and the .gitignore file.
For new repositories it makes sense to check all the checkboxes and choosing the options that fit your needs. However, if you’re pushing an existing project you’ll most likely already have taken care of these three files on your local machine. And if you haven’t you’ll overwrite the generated files with your new local repository, deleting anything that GitHub generated on your behalf.
Click “Create repository” once you’ve set everything up to see your repository in GitHub’s web interface.
Once you’re on this page, you’ll see something like the following picture:
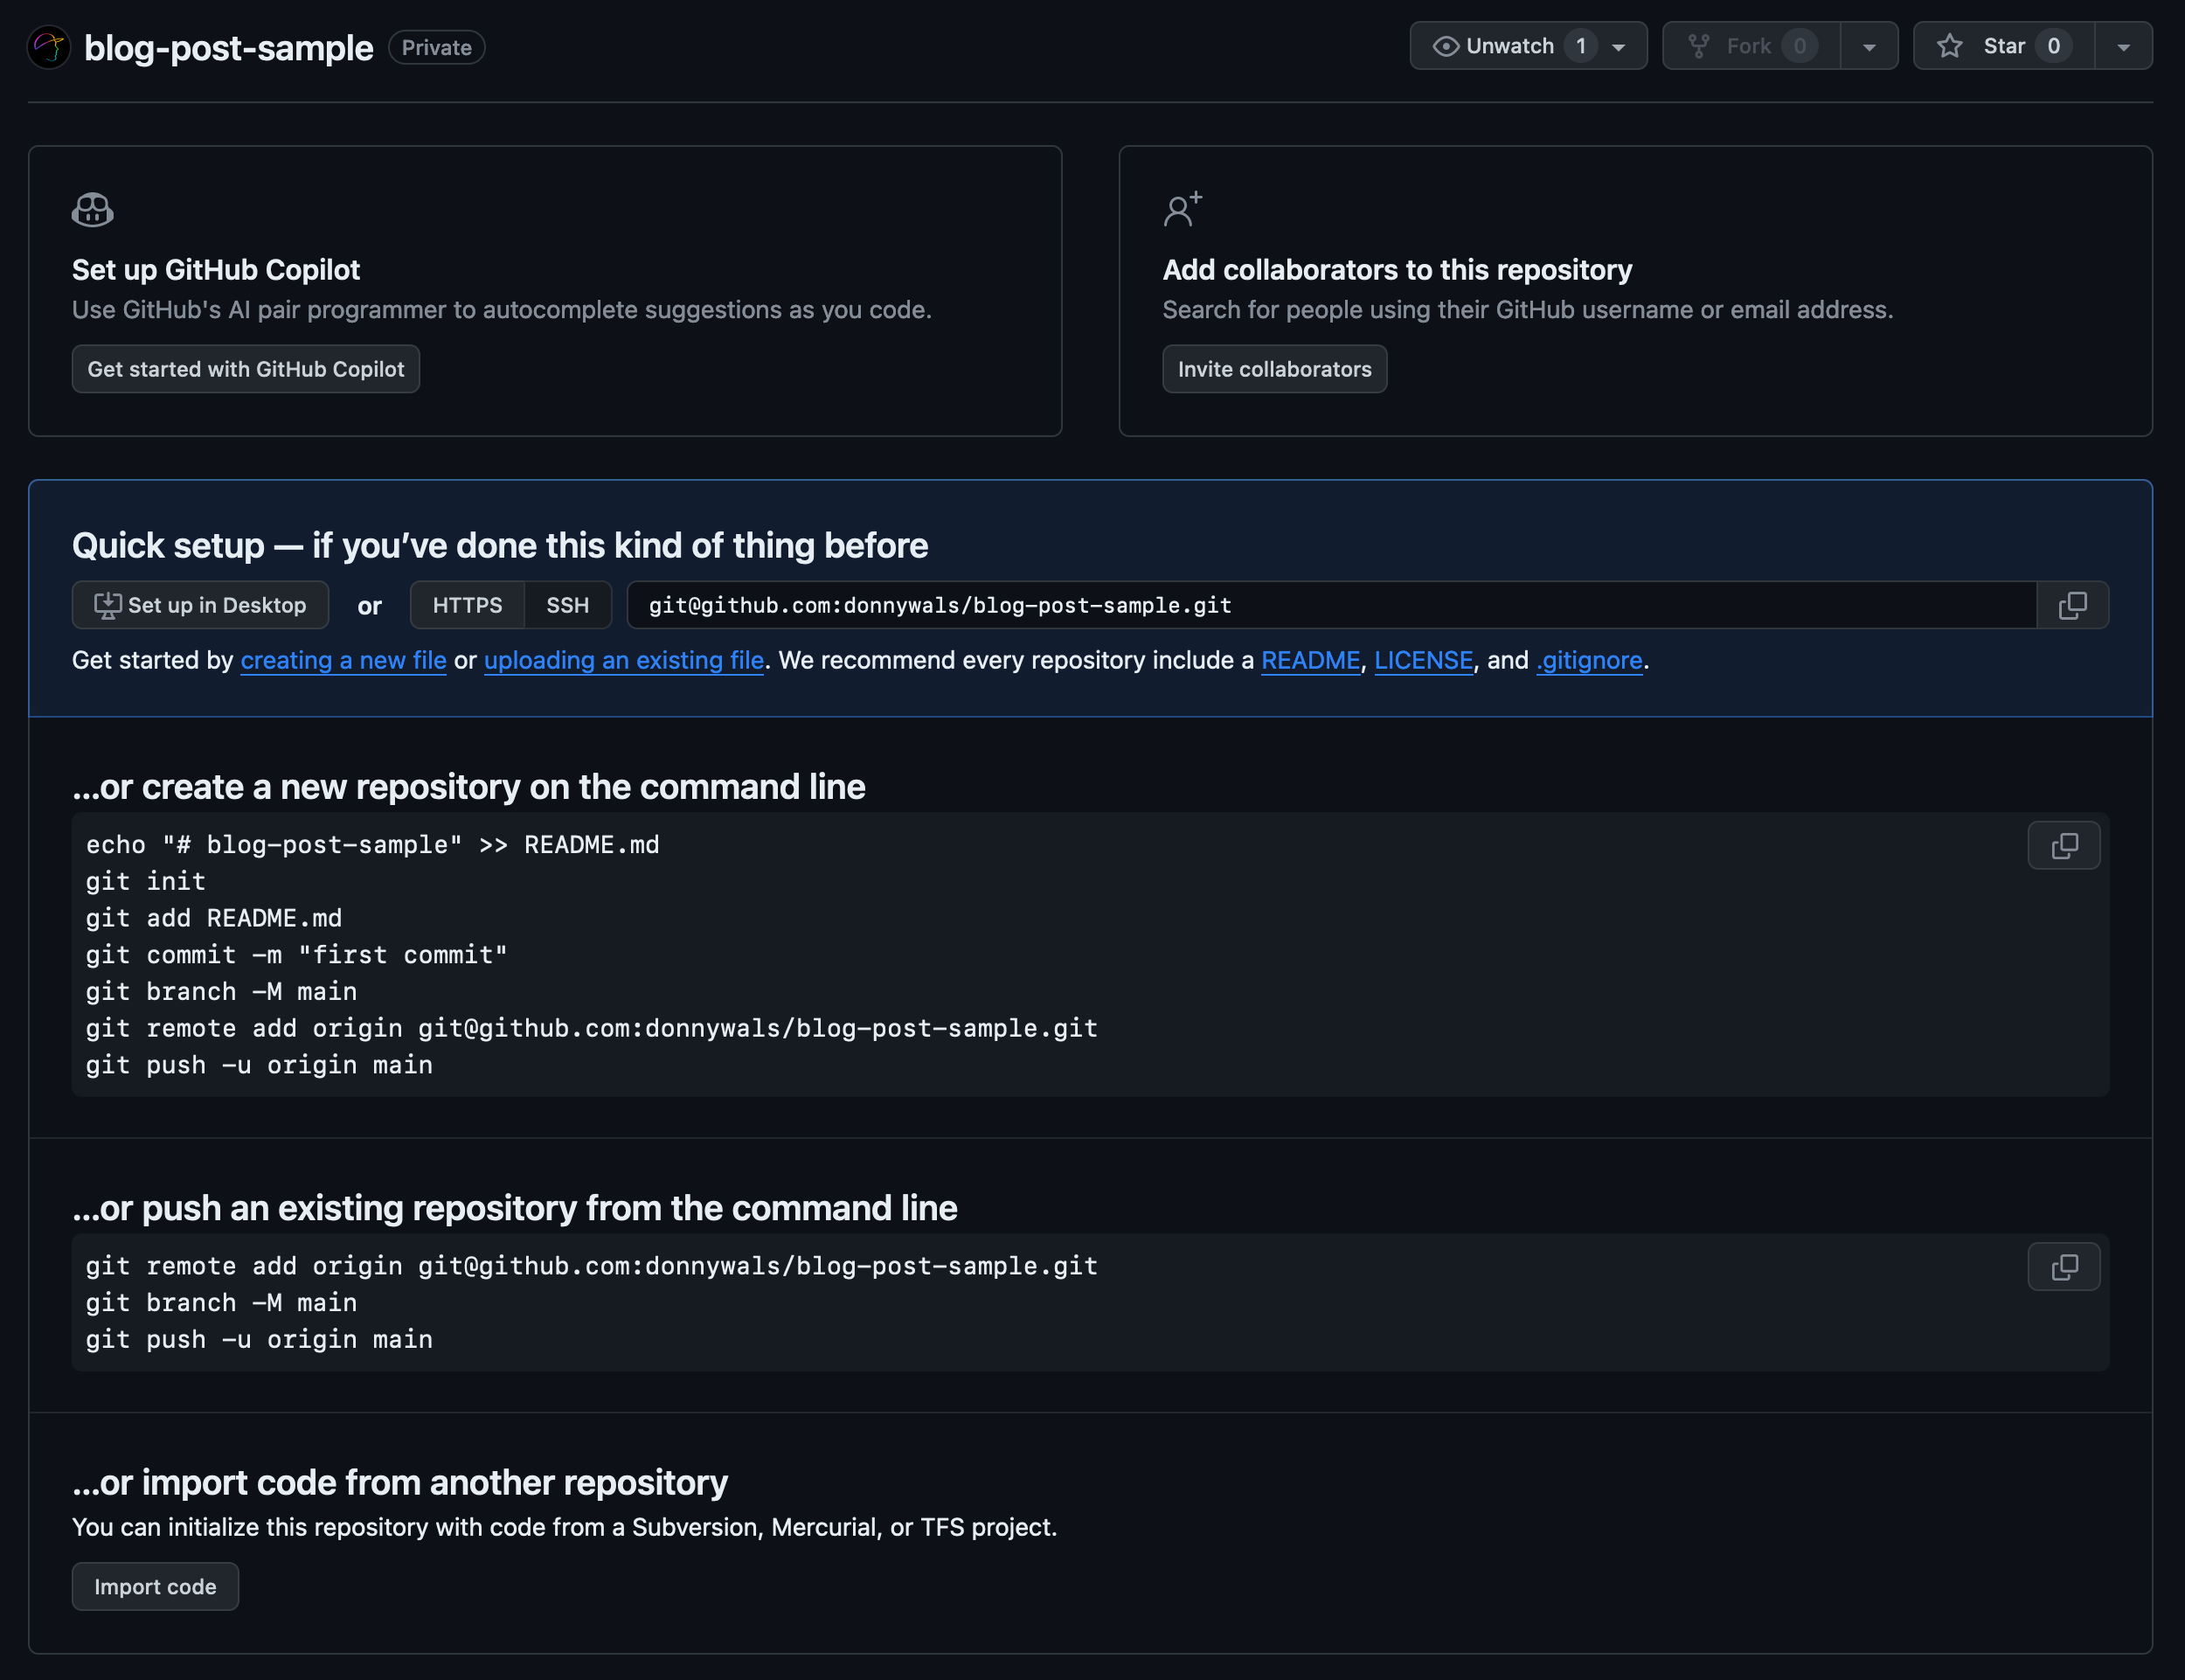
Notice how there are several instructions that you can follow to either clone your project to your computer, or to connect an existing repository to this remote repository.
If you’ve made a completely new project that you don’t have a local repository for yet, you can either follow the instructions under the “create a new repository on the command line” header or you can directly clone your repository using the command below:
git clone [email protected]:<your repo>You’ll want to replace <your repo> with your repository name. For the correct path to your repo, you can copy the [email protected] URL that’s shown under the “Quick Setup” header.
Once you’ve cloned your repository you can start adding code, making commits, branches, and more.
The process of preparing an exiting repository to talk to your new remote is a little bit more involved. The key steps are the following three git commands. All three commands should be run from within the git repository that you want to push to your newly created remote.
git remote add origin <URL>
git branch -M main
git push -u origin main
The first command in this sequence adds a new remote destination to your git repository. We can name our remotes, and in this case the chosen name is origin. You can use a different name if you prefer, but origin is pretty much an industry standard so I would recommend to not use a different name for your remote.
The second command sets a branch called main to be the main branch for this repository. This means that if somebody (or you) clones your repository, the default branch they’ll check out is main. Again, you can change this to be any branch you’d like but main is an industry standard at this points so I recommend keeping main as your default branch.
Finally, a git push is executed. The command pushes the chosen branch (main in this case) to a remote repository. In this case we specify that we want to push our branch to the origin that we’ve set up before. The -u flag that’s passed makes sure that our local main branch is set up to track the remote branch origin/main. Doing this will allow git to check whether our remote repository contains commits or branches that we don’t have locally.
Let’s see how we can interact with our remote repository through pushing, pulling, and more.
Interacting with a remote repository
Once our local repository is set up to track a remote, we can start interacting with it. The most common interactions you’ll have with a remote repository are pushing and pulling.
We’ve already looked at pushing code in the previous section. When we execute a push command in a local git repository all commits that belong to the branch we’re pushing are uploaded to the local git server.
Usually, pushes are fairly trivial. You execute a push, and the code ends up on your remote server. However, sometimes you’ll try to push but the remote returns an error. For example, you might run into the following error:
error: failed to push some refs to '<YOUR REPO URL>'
hint: Updates were rejected because the remote contains work that you do
hint: not have locally. This is usually caused by another repository pushing
hint: to the same ref. You may want to first integrate the remote changes
hint: (e.g., 'git pull ...') before pushing again.
hint: See the 'Note about fast-forwards' in 'git push --help' for details.
This error tells us what’s wrong and what we can do to resolve the issue. Git is usually quite good at this so it’s very important to carefully read errors that git presents to you. More often than not the error is pretty descriptive but the terminology might seem a bit foreign to you.
One unconventional tip that I’d like to give here is that you can as ChatGPT to clarify the issue given to you by git. This often works well due to how common git is amongst different developers which means that an AI like ChatGPT can be very well trained to help understand problems.
For the error shown above, the usual solution is to run a git pull before pushing. When you run git pull, you pull down all the commits that the remote has for your branch. After running your pull, you can try pushing your branch again. Usually this will succeed unless a new error occurs (which I’d say is uncommon).
Another command that you can use to pull down information about the remote repository is git fetch.
While git pull downloads new commits and applies them to your branch, merging in any commits that were on the remote but not on your local branch yet, a git fetch only downloads changes.
This means that the new commits and branches that existed on the remote will be downloaded into your local repository, but your branches are not updated (yet) to mirror the contents from the server.
Using git fetch is useful if you want to run git log after fetching to inspect what others have worked on without immediately updating your local branches. It’s also useful if you want to list all branches that currently exist both locally and remotely without updating your local branches just yet.
You can list all branches that exist locally and remotely using the git branch --all command. The list that’s printed by this command contains all branches in your repository, allowing you to see if there are any branches on the remote that you don’t have locally.
To switch to one of these branches, you can write git checkout <branch-name> and git will create a local branch that tracks its remote counter part if you didn’t have a local copy yet. If you did use this branch at some point, git will switch to the existing branch instead.
To update this existing version of the branch so it’s at the same commit as the remote you can use a regular git pull.
Once you’ve made a couple of commits and you’re ready to push your branch to the server you can go ahead and use git push -u origin yourbranch to push your new commits up to the remote, just like you’ve seen before.
At some point in time, you might want to delete stale branches that you no longer need. Doing this is a little bit tricky.
Locally, you can delete a branch using git branch -d branchname. This won’t delete your branch if no other branch contains the commits from the branch you’re about to delete. In other words, the -d option checks whether your branch is “unmerged” and warns you if it is.
If you want to delete your branch regardless of its merge status you write git branch -D branchname. This will skip the merge checks and delete your branch immediately.
When you want to delete your branch on your remote as well, you need to push your delete command. Here’s what that looks like:
git push origin --delete branchnameUsually the web interface for your remote repository will also allow you to delete your branches at the click of a button.
In Summary
In this post, we’ve explored establishing and managing a git repository, with a particular focus on using GitHub. We began by underscoring the importance of maintaining a local git repository and the added advantages of hosting it on a remote server like GitHub. Having a remote repository not only makes collaboration easier but also provides a backup of your work.
We looked at the steps needed to create a new remote repository on GitHub. You learned that there are several ways to connect a local repository with a remote, and you’ve learned how you can choose the option that best suits you.
Finally, we explored various interactions with a remote repository, including essential tasks like pushing and pulling code, and managing local and remote branches. We discussed how to address common errors in these processes, highlighting the instructive nature of Git's error messages. Commands such as git fetch, git branch, and git checkout were covered, providing insights into their roles in synchronizing and managing branches. The post wrapped up with guidance on deleting branches, detailing the differences between the git branch -d and git branch -D commands, and the process for removing a branch from the remote repository.